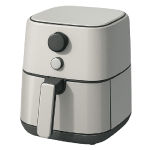
An air fryer not turning on is one of the most common — and most fixable — small appliance problems in 2026. Some causes take five minutes to resolve with no tools at all; others require basic electrical diagnosis inside the unit. This guide ranks every cause from most to least likely so you can work through them in order and stop the moment you find the culprit.
5 Common Causes for an Air Fryer Not Turning On
1Tripped GFCI Outlet or Power Supply Problem
Air fryers draw between 1,200 and 1,875 watts — enough to trip a GFCI outlet, overload a shared circuit, or expose a marginal power strip. Before opening the appliance, rule out every power supply issue first. This step alone resolves the problem for a significant percentage of users.
Symptoms
- The unit shows absolutely no sign of life — no display, no beep, no indicator light — when plugged in and switched on.
- The air fryer worked normally in a previous session but is now completely unresponsive with no other changes to the appliance itself.
Care Plan
- Unplug the air fryer from the outlet before doing anything else.
- Locate the GFCI outlet — look for a wall outlet with Test and Reset buttons, often found in kitchens, bathrooms, and garage spaces. If the outlet in question does not have these buttons, check nearby outlets and your electrical panel for a tripped breaker.
- Press the Reset button firmly until it latches in place. If the Reset button will not stay latched, a downstream fault may still be present on the circuit. Do not force it — leave the circuit de-energized, unplug all appliances connected to that circuit, and investigate before attempting to reset again. If the GFCI will not reset and stay latched even with all downstream appliances unplugged, there may be an active ground fault on the wiring itself. Stop, do not plug the air fryer back in, and contact a licensed electrician before using that outlet again.
- Test the outlet with a different appliance — a phone charger or lamp works well — to confirm the outlet is now delivering power.
- Plug the air fryer directly into a wall outlet rather than a power strip or extension cord. Most consumer power strips are not rated for the sustained high-wattage draw of an air fryer and can cause nuisance trips or voltage drop. If you must use a power strip, use one rated for at least 15 amps and 1,875 watts. If the unit still does not power on after plugging it directly into a confirmed working outlet, move to Cause 2.
Common Mistakes
- Resetting the GFCI without unplugging the air fryer first — if the unit itself is causing the fault, the outlet will trip again immediately.
- Assuming a power strip is adequate because it works for lower-draw appliances like a toaster or coffee maker; air fryers require a dedicated or high-rated circuit for reliable operation.
2Faulty Door or Basket Safety Switch
All air fryers include one or more interlock switches that prevent the unit from operating unless the basket or drawer is fully seated. These switches are small, inexpensive components that can fail from repeated use, food debris bridging the contacts, or slight physical misalignment of the basket over time.
Symptoms
- The unit appears completely dead, or briefly flickers and shuts off before any cooking begins — both can indicate the safety switch is not fully engaging.
- Removing and reinserting the basket sometimes produces a brief flash of the display or a single beep, suggesting the circuit is intermittently completing.
Care Plan
- Unplug the air fryer from the wall outlet.
- Remove the basket or drawer completely and inspect the area around the switch contact — typically a small button or lever recessed into the frame near the basket opening. Look for grease buildup, food debris, or visible damage to the switch body.
- Clean the switch contact area using a cotton swab lightly dampened with isopropyl alcohol (90% or higher). Allow it to dry completely before proceeding.
- Reinsert the basket firmly until you feel or hear it click fully into place, then plug the unit back in and test. Some models require the basket to be pushed past a soft stop — consult your model’s manual if resistance seems unusual.
- If the unit still does not power on, the switch itself may have failed internally. Order a replacement switch specific to your model (typically $5–$25 from the manufacturer’s parts site or a reputable appliance parts supplier). If you are not comfortable disassembling the unit to replace the switch, a small appliance repair technician can perform this repair — expect $50–$120 in labor depending on your market.
Common Mistakes
- Testing with the basket only partially inserted, which confirms nothing about whether the switch is the root cause.
- Ordering a universal replacement switch instead of a model-specific part — switch geometry and actuation depth vary significantly between brands and can cause the replacement to fail to actuate correctly.
3Blown Thermal Fuse
A thermal fuse is a one-time-use safety device that permanently breaks the circuit if the appliance overheats beyond its rated threshold. Once blown, it cannot be reset — the unit will show no power whatsoever until the fuse is physically replaced. Thermal fuses blow due to blocked vents, a failing fan, or running the unit for extended periods without adequate clearance around it.
Symptoms
- The unit is completely unresponsive — no display, no fan noise, no indicator light — even after confirming the outlet and basket switch are working correctly.
- The unit overheated, produced unusual smoke, or shut off abnormally during the most recent cooking session before becoming completely dead.
Care Plan
- Unplug the air fryer and allow it to cool to room temperature if it was recently used.
- Remove the outer housing by unscrewing the fasteners on the base and rear panel — typically Torx T10 or Phillips #2 screws. Consult a model-specific disassembly video if you are uncertain; forcing panels can crack plastic clips.
- Locate the thermal fuse — it is a small cylindrical component with two wire leads, positioned near the heating element or along the main wiring harness. Its location varies by model: in some units it sits directly on the heating element housing; in others it is positioned along the wiring harness feeding the control board. Refer to your model’s service diagram or a model-specific disassembly video to locate it accurately before probing.
- Set a multimeter to continuity mode and touch one probe to each wire lead of the fuse (with the unit unplugged and cool). A working fuse reads continuity (a beep or near-zero ohms). No continuity confirms the fuse is blown.
- Order a replacement thermal fuse that exactly matches the rating printed on the original fuse — commonly 184°C, 192°C, or 216°C. Always match the rating printed on the original fuse exactly; installing a fuse with a higher temperature rating than specified is a fire hazard. Connect the replacement using insulated crimp connectors rated for the wire gauge in your unit. Do not use open wire nuts or tape. If your fuse connections require soldering rather than crimp connectors, have the repair performed by a licensed appliance technician — a poor solder joint in a high-heat zone can arc or fail silently and create a fire risk. If the new fuse blows again quickly, the underlying cause of the overheating (blocked fan, clogged vents) must be resolved before using the unit again.
Common Mistakes
- Installing a replacement thermal fuse with a higher temperature rating than the original in an attempt to prevent future trips — this defeats the safety function of the component entirely.
- Skipping the root-cause investigation after replacing the fuse; if the condition that caused overheating is not corrected, the replacement fuse will blow again.
4Failed Control Board
The control board is the central circuit board that processes button inputs, regulates temperature, and drives the display. It can fail from power surges, moisture intrusion, or component fatigue over years of use. A completely dead board produces a unit that is totally unresponsive to all inputs.
Symptoms
- The unit shows no display, no indicator light, and no response to any button press after confirming the outlet, basket switch, and thermal fuse are all functioning correctly.
- Visible burn marks, carbon scoring around specific components, or cracked and lifted solder joints near high-heat components on the board surface.
Care Plan
- Unplug the air fryer and wait at least 60 seconds before opening the housing or touching any internal components.
- Remove the housing (see disassembly notes in Cause 3, Step 2) and locate the control board — typically a green or black circuit board mounted behind the display panel or on the underside of the unit.
- Inspect the board visually for burn marks or carbon scoring around specific components, bulging or domed capacitor tops, and cracked or lifted solder joints near high-heat components. Any of these signs confirms board failure. Also check that all ribbon cables (thin, flat, flexible strips) and wire harness connectors (multi-wire plastic plugs) are fully seated — press each connector straight down or inward until it clicks or sits flush. A loose connector can mimic a dead board.
- Order a replacement control board specific to your model. OEM boards for name-brand units such as Ninja, Cosori, or Instant Vortex typically retail at $25–$80; some models may typically retail at $25–$80; some models may require replacing the entire display panel assembly if the board and screen are integrated. Photograph the original wiring configuration before disconnecting any harnesses to ensure correct reassembly.
- Professional Service: If a replacement board is unavailable or if the repair requires soldering skills you are not comfortable with, a professional repair typically costs $100–$200. For entry-level air fryers, this usually exceeds the cost of a new unit.
Common Mistakes
- Replacing the board when the fuse was the problem. Always test the thermal fuse (Cause 3) first. A $5 fuse failure is far more common than a $50 board failure and produces the exact same “dead unit” symptom.
- Touching board components with bare hands. Static electricity from your fingertips can kill the sensitive processor on a new board. Always touch a metal surface to “ground” yourself before handling the PCB.
5Damaged Power Cord or Loose Internal Connection
The power cord on an air fryer is subjected to heat and frequent movement. Over time, the internal copper strands can break near the plug or where the cord enters the appliance. Additionally, the high vibration from the internal fan can occasionally loosen the spade connectors that join the power cord to the main terminal block inside the unit.
Symptoms
- The unit powers on only when the cord is held at a specific angle or “jiggled.”
- You see visible fraying, melted insulation, or deep kinks in the power cord.
- The unit worked fine, was moved to a new spot, and now shows zero power despite a working outlet.
Care Plan
- Visual Inspection: With the unit unplugged, run your hand along the entire length of the cord. Feel for soft spots or internal breaks. Inspect the prongs on the plug for discoloration or bending.
- Continuity Test: If you have a multimeter, set it to continuity (beep mode). Touch one probe to a plug prong and the other to the corresponding wire terminal inside the unit (requires opening the housing). If the meter doesn’t beep, the cord has an internal break and must be replaced ($5–$20).
- Check Internal Terminals: Open the base or rear panel. Locate where the power cord connects to the unit’s internal wiring (the terminal block). Ensure the screws or spade connectors are tight. If a wire has slipped off, reconnect it firmly.
- Replace if Damaged: If the cord is frayed or melted, do not attempt to patch it with electrical tape. Air fryers draw too much current for tape to be a safe fix. Install a new, manufacturer-approved power cord assembly.
Common Mistakes
- Using a standard extension cord. Most household extension cords are rated for 10 amps or less. An air fryer can pull 15 amps, which will cause the extension cord to overheat, melt, and potentially start a fire before the air fryer even turns on.
- Patching with wire nuts. Internal connections should use high-temperature crimp connectors or the manufacturer-supplied terminal block to handle the heat generated by the appliance.


