An air fryer that smells weird is one of the most common complaints owners report in 2026 — and the fix is usually straightforward. While most odors trace back to grease buildup or a new-unit coating burn-off, some causes require component-level troubleshooting. This guide ranks all five causes from most to least likely so you can diagnose and fix the problem efficiently.
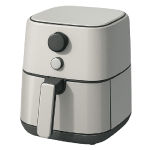
5 Common Causes for an Air Fryer That Smells Weird
1Grease and Food Residue Buildup
This is by far the most common reason an air fryer smells bad. Over time, grease, oil splatter, and food particles accumulate on the basket, drawer, and interior walls. When the unit heats up, these deposits cook again and produce a rancid, smoky, or stale odor that gets stronger with each use.
Symptoms
- A rancid, greasy, or smoky smell that appears immediately after the unit reaches temperature
- Smoke visible through the vent during cooking, even with an empty basket
Care Plan
- Unplug the unit and allow it to cool completely before touching any component.
- Remove the basket and drawer and inspect them under good lighting for grease deposits, dark residue, or stuck-on food.
- Soak both components in warm water with a small amount of dish soap for 10–15 minutes to loosen baked-on grease.
- Scrub gently with a non-abrasive sponge or soft brush — avoid metal scourers that damage non-stick coatings.
- Wipe the interior cavity walls with a cloth lightly dampened with diluted dish soap, then wipe again with a clean damp cloth to remove soap residue. Dry all components thoroughly before reassembling. If the smell persists after two or three thorough cleanings, move on to Cause 3 — burnt debris may have reached the heating element.
Common Mistakes
- Using high-heat or sanitize dishwasher cycles, or harsh detergent pods, which degrade non-stick coatings faster than hand washing — even on baskets labeled dishwasher-safe.
- Reassembling and running the unit before all components are fully dry, which can cause a brief steam-and-smell episode and accelerate coating wear.
2Factory Coating Off-Gassing (New Unit)
Brand-new air fryers frequently emit a chemical, plastic-adjacent, or “hot metal” smell during the first one to three uses. This is caused by protective manufacturing oils, anti-corrosion coatings, and bonding agents on the heating element and interior surfaces burning off at cooking temperature. The smell is expected and is not a defect.
Symptoms
- A chemical, plastic, or metallic smell present only on the first few uses of a new unit
- Faint visible haze or light smoke during the first one or two seasoning cycles
Care Plan
- Unplug the unit if it is currently running and allow it to cool completely.
- Remove the basket and drawer and wash them with warm soapy water, then dry thoroughly — this removes any manufacturing residue from the surfaces you will cook on.
- Place the empty, reassembled unit in a well-ventilated area — near an open window or with a kitchen exhaust fan running. Keep pets out of the room during this step, as heating certain non-stick coatings can release fumes that are harmful to birds even at normal cooking temperatures.
- Run the empty unit at its highest temperature setting for 10–15 minutes. This is called a seasoning run and it burns off the remaining factory coating.
- Allow the unit to cool, then wipe the interior with a damp cloth to remove any residue that has loosened. Repeat the seasoning run once or twice if a faint smell remains. If the odor does not resolve after three seasoning cycles on a new unit, contact the manufacturer — some coating defects are covered under warranty.
Common Mistakes
- Running the seasoning cycle in a closed room or with no ventilation, which concentrates fumes unnecessarily.
- Assuming the smell means the unit is defective and returning it before completing at least two to three seasoning cycles.
3Burnt Food Debris Near the Heating Element
Small food particles — crumbs, herb fragments, loose breading — can fall from the basket and settle on or near the heating element at the top of the air fryer cavity. Once there, they carbonize each time the unit runs, producing a sharp, acrid, or burnt smell that is distinct from general grease odor. Over time, accumulated charred debris presents a small but real fire risk.
Symptoms
- A sharp, acrid, or charred smell that persists even after the basket and drawer have been thoroughly cleaned
- Smoke coming from the top vents specifically, even after the basket and drawer have been thoroughly cleaned — distinguishing this symptom from Cause 1
Care Plan
-
Unplug the unit and allow it to cool completely — do not rush this step.
-
Remove the basket and drawer and set them aside. Look up into the top of the air fryer cavity with a flashlight to locate the heating element and identify any visible debris.
-
For standard basket-style air fryers where the heating coil is mounted at the top of the cavity: turn the unit upside down over a trash can and gently tap the base to dislodge loose debris. Skip this step for oven-style or dual-basket air fryers, where the element orientation differs and inverting the unit may direct debris toward the element rather than away from it.
-
Use a dry soft-bristle brush or dry microfiber cloth to gently sweep debris away from the element and off the surrounding cavity walls. Work carefully to avoid bending or contacting the coil directly.
-
Wipe the surrounding cavity walls — not the coil itself — with a cloth lightly dampened with water only. Never apply a damp or wet cloth directly to the heating coil or its mounting junctions. Moisture introduced into the coil assembly, ceramic insulators, or terminal connections can cause an electrical short. If you are unsure of the boundary between the coil and the cavity wall, use only the dry brush method and stop there. If the smell persists after this cleaning, the debris may be fused to the element and the unit should be taken to a certified appliance technician.
Common Mistakes
- Spraying any liquid cleaner into the top cavity without checking whether it will contact the heating element or its terminal connections.
- Inverting an oven-style or dual-basket air fryer to dislodge debris — in these models, doing so can move debris onto the element rather than away from it.
4Degraded or Failing Heating Element
Over time — particularly in units used frequently or that have experienced moisture exposure — the heating element itself can begin to degrade. Oxidation, localized corrosion, or physical damage to the coil causes it to emit a persistent burnt-metal or electrical smell during and after operation. This cause is less common than buildup issues but more serious, and it requires internal inspection.
Symptoms
- A persistent burnt-metal or sharp electrical smell that cannot be linked to any visible food debris or grease
- Visible surface discoloration on the heating coil when the unit is cold and unplugged — look for dark oxidation patches, burn marks, localized blackening, or areas where the coil appears warped or pitted (this is distinct from the normal uniform darkening that occurs with regular use)
Care Plan
- Unplug the unit from the wall outlet and allow it to cool for at least 15–20 minutes. Wait an additional 60 seconds after unplugging before opening any panel — air fryer control boards contain capacitors that can hold a residual charge even after unplugging.
- Remove the basket and drawer. Use a flashlight to examine the visible portion of the heating coil for the surface discoloration described above — dark spots, scale buildup, localized blackening, or warping visible while the unit is cold and unplugged.
- If damage is visible, locate your model number on the compliance or specification sticker on the bottom or rear of the unit — it lists the model number, wattage, and voltage. Search for a replacement heating element specific to your model number through the manufacturer’s parts portal or a reputable appliance parts supplier. Replacement elements typically cost $15–$40, though prices vary by brand and model — verify part availability before committing to repair. Less common or import-brand models may have limited or no parts availability.
- ⚠ Confirm the unit is fully unplugged from the wall before removing any panels or touching internal components. If your model requires removing the chassis panels to access the heating element bracket, consult the manufacturer’s official service documentation for your specific model. If the repair requires disturbing internal wiring — not just the element bracket and its dedicated mounting screws — stop here and take the unit to a certified appliance repair technician. Avoid touching any circuit boards, capacitors, or unmarked electrical components; handle only the heating element bracket and its dedicated mounting screws.
- If professional repair is needed, labor typically runs $60–$150 depending on your location and the shop’s rate structure. Note that many shops charge a separate diagnostic or bench fee of $50–$75 before repair work begins — ask upfront before authorizing any work. If the combined parts and labor cost approaches or exceeds the price of a new unit, replacement is the more practical choice.
Common Mistakes
- Attempting to diagnose a failing element by observing it while the unit is running — never look into the cavity or touch any internal component while the unit is plugged in.
- Relying on unvetted YouTube teardown videos for internal disassembly guidance. Use the manufacturer’s official service documentation or consult a certified repair technician, particularly if internal wiring must be disturbed to access the element.
5Melted Plastic or Foreign Material Inside the Cavity
Plastic bag ties, food packaging, rubber bands, or other foreign materials occasionally find their way into the air fryer basket and melt onto the cavity walls or heating element during cooking. The result is a sharp, acrid chemical or burning-plastic smell that is distinctly different from food odor and does not resolve with standard cleaning.
Symptoms
- A sharp, chemical, or burning-plastic smell that began suddenly during or after a specific cooking session
- Visible discoloration, residue, or a shiny melted patch on the interior cavity walls
Care Plan
- Locate the Residue: Open the unit and use a flashlight to inspect the interior walls, the heating element, and the underside of the top housing. Look for a shiny, hardened, or discolored patch where a foreign object may have fused to the metal.
- Removal (Surface Only): If the melted plastic is on a flat metal wall, allow the unit to cool completely. Use a plastic scraper or a wooden spatula to gently pop the hardened residue off the surface. Do not use a metal knife, as scratching the protective coating will lead to rust.
- Removal (Heating Element): If plastic is melted onto the coil itself, do not scrape it. Dampen a microfiber cloth with a small amount of rubbing alcohol (isopropyl) and gently rub the cold element. If the residue is thick, it may require professional element replacement (Cause 4), as scraping the coil can damage its outer sheath.
- Run a Test Cycle: Once the material is removed, run the empty unit at 400°F in a well-ventilated area for 10 minutes to burn off any microscopic remnants.
Common Mistakes
- Using “Goo Gone” or citrus cleaners. These are often flammable and leave a chemical film that will smoke and smell worse during the next cook cycle. Only use soap and water or rubbing alcohol (allowing it to evaporate completely before use).
- Forcing the removal. If plastic is fused deeply into the fan guard or heating element, forcing it off can bend the components. In these cases, it is safer to replace the part.


