An air fryer that won’t turn off is more than an inconvenience — left unattended, it can overheat, damage your countertop, or create a fire risk. In 2026, this issue remains one of the most reported air fryer faults. Some fixes take under ten minutes; others require component-level repair. This guide ranks the four most common causes from most to least likely so you can diagnose and resolve the problem efficiently.
4 Common Causes for an Air Fryer That Won’t Turn Off
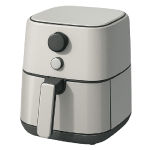
1Stuck or Malfunctioning Timer Dial
On analog air fryer models, a mechanical dial controls the cooking timer and directly triggers the power shutoff when rotated to the zero/off position. Over time, grease buildup, worn internal gears, or a bent stop tab can prevent the dial from fully seating at the off position, leaving the heating element energized. This is the most common cause and the easiest to diagnose and fix without tools.
Symptoms
- The unit continues to run after the timer appears to reach zero
- The dial feels loose, gritty — in a way that does not improve after wiping the exterior — or fails to produce a distinct click at the off position
- The dial spins freely past the stop point with little resistance
Care Plan
- Unplug the air fryer from the wall outlet immediately.
- Inspect the exterior of the dial for visible grease buildup or debris around the base. Wipe the dial and the area around it with a dry cloth or a cotton swab lightly dampened with warm water — do not use liquid cleaners near the dial shaft.
- With the unit still unplugged, rotate the dial firmly and deliberately to the zero/off stop position — not past it. The stop position is a mechanical hard stop; forcing the dial beyond it can strip the internal gear or break the stop tab, permanently disabling the shutoff function. Hold the dial at the stop for two to three seconds to confirm it has fully seated.
- Plug the unit back in and run a short one-minute test cycle. When the timer reaches zero, observe whether the unit shuts off cleanly with an audible click.
- If the dial still does not engage the shutoff — or if it spins freely with no resistance at the stop — the internal timer assembly needs to be replaced. Search for a replacement using your model number (printed on the base label). Timer assemblies for common brands such as Cosori, Ninja, and Instant typically cost $8–$25 online. If you are not comfortable performing the swap yourself, a small appliance repair shop will charge approximately $40–$80 in labor. Note: Prices vary by region and model.
Common Mistakes
- Rotating the dial deliberately past the zero/off hard stop in an attempt to “force” the shutoff — this can strip the gear teeth or snap the stop tab, making the shutoff permanently non-functional.
- Replacing the dial knob (the external cap) when the actual failure is inside the timer assembly mechanism — confirm which component is worn before ordering parts.
2Jammed or Failed Power Button
On digital and touch-panel air fryers, the power button — whether a physical tactile switch or a flexible membrane switch — is responsible for toggling the unit on and off. These are two distinct component types: touchscreen and soft-touch panels typically use a membrane switch (a flexible printed circuit layer bonded to the panel), while models with a physical push button use a tactile switch (a discrete mechanical component soldered or socketed on the circuit board). Your model’s panel design determines which type you have. Either type can fail in a stuck-closed state due to moisture intrusion, grease contamination, or physical wear — causing the unit to remain powered on and unresponsive to button presses.
Symptoms
- The power button does not respond when pressed — the unit stays on and does not toggle off
- The button feels physically stuck, sunken, or offers no tactile feedback when pressed
- The panel is unresponsive to all touch input, not just the power button
Care Plan
- Unplug the air fryer from the wall outlet.
- Inspect the exterior of the button or touch panel for visible grease, food residue, or moisture. Dampen a cotton swab with 90% or higher isopropyl alcohol (not water) and clean around the perimeter of the button or the surface of the touch panel. Allow it to dry completely — at least five minutes — before testing.
- Plug the unit back in and test the button. If it now responds, the issue was surface contamination and no further repair is needed.
- If the button remains unresponsive, the internal switch component needs to be replaced. Before opening the housing, photograph the exterior panel and note the screw locations. Remove the outer housing screws (typically Phillips head) and carefully separate the panel. Do not pry aggressively — many panels are held by plastic clips that break easily. Once the panel is open, identify your switch type: a membrane switch will be a thin flexible sheet connected to the board by a ribbon cable; a tactile button will be a small dome-shaped component on the circuit board. Photograph all wire connections and cable routing before disconnecting anything. Disconnect the ribbon cable by gently lifting the cable lock tab — do not pull the cable directly. Replace the faulty component with a matching part sourced by model number ($5–$20 for most models) and reassemble in reverse order.
- If you are not comfortable identifying the switch type, handling ribbon cables, or sourcing a matching component, escalate to a small appliance repair technician. Professional labor for this repair typically runs $40–$75. Prices vary by region.
Common Mistakes
- Using water or liquid kitchen cleaner to clean a touch panel — moisture can migrate into the circuit layer and cause additional damage or a short circuit.
- Confusing a membrane switch with a tactile button and ordering the wrong replacement part — identify your component type before purchasing.
3Faulty Control Board
The control board is the central processing unit of a digital air fryer — it interprets button inputs, manages the timer, and signals the heating element and fan to stop. A shorted trace, a failed capacitor, or a processor that has entered an unresponsive state can cause the board to hold the unit in a permanently “on” condition, ignoring all shutdown commands. In some cases, the board is not physically damaged but has entered a frozen state that a hard reset can resolve without any hardware replacement.
Symptoms
- The unit runs continuously and does not respond to the power button, timer controls, or any touch input
- The display freezes, shows garbled characters, or goes blank while the unit remains powered on
- The unit turned off normally in the past but began this behavior suddenly after a power surge or outage
Care Plan
- Unplug the air fryer from the wall outlet. Before any disassembly, perform a hard reset first: leave the unit unplugged for 60 seconds, then plug it back in and test normal operation. This allows the unit’s internal processor to fully restart, which can resolve frozen or unresponsive control behavior without any hardware replacement — and also allows internal capacitors to discharge safely.
- If the hard reset does not resolve the issue, unplug the unit again. Confirm warranty status before proceeding — if the unit is under 2 years old, contact the manufacturer for a service referral rather than opening the housing yourself.
- With the unit unplugged and cooled, remove the outer housing screws and carefully separate the panels. Photograph all wire connections, cable routing, and the board orientation before touching anything. Visually inspect the control board for obvious signs of failure: burn marks (dark discoloration on the board surface), swollen or bulging capacitors (the cylindrical components — a healthy capacitor has a flat top; a failing one bulges or leaks), or melted plastic near board connectors. Note: cracked solder joints are typically microscopic and cannot be reliably detected by eye without magnification and experience — do not expect to identify this type of failure visually.
- If visible damage is found, source a replacement board using your model number. OEM replacement boards for common brands typically cost $25–$90, with premium models potentially exceeding $100. Prices vary significantly by brand and model — verify part availability and cost before committing to repair. Carefully disconnect the ribbon cable by lifting its lock tab, then disconnect any wire harnesses (the bundled colored wire connectors). A ribbon cable is a flat, flexible strip of plastic with a row of contacts at the end; wire harnesses are groups of individual wires joined by a plastic plug connector. Swap the board and reassemble in reverse order, using your photographs as a reference.
- If no visible damage is found on the board and the hard reset did not help, the fault may require component-level diagnosis with a multimeter — this exceeds the scope of a DIY repair. Take the unit to a small appliance technician. Professional diagnosis and board replacement typically costs $60–$120 in labor. Prices vary by region.
Common Mistakes
- Plugging the unit back in to test it before performing a visual inspection — if the board is shorted, re-energizing it can cause further damage or create a fire hazard.
- Touching the control board immediately after unplugging without waiting at least 60 seconds for capacitors to discharge
4Failed Thermal Cutoff or Thermistor
The thermal cutoff (TCO) and thermistor are safety components that monitor the air fryer’s internal temperature. A thermistor is a sensor that tells the control board how hot the unit is; a thermal cutoff is a safety fuse that should blow to kill power if temperatures reach dangerous levels. If the thermistor fails in a way that reports a “falsely low” temperature, or if a relay on the heater circuit has welded itself shut, the unit will continue to heat indefinitely because it “thinks” it hasn’t reached the target temperature yet.
Symptoms
- The unit stays on and continues to get hotter and hotter, well past the set temperature.
- You hear the fan running and the heater clicking rapidly or staying on constantly.
- The display may show an error code (such as E1 or E2 on many Ninja or Gourmia models).
Care Plan
- Unplug the unit immediately. Do not wait for a timer. A runaway heating element is a severe fire hazard.
- Access the sensor: Once the unit is cold and unplugged, remove the base or top panel to locate the thermistor—typically a thin wire probe tucked near the heating element.
- Test with a multimeter: Set your multimeter to the Resistance (Ohms) setting. Touch the probes to the thermistor’s wire leads. A healthy thermistor should show a specific resistance value (often 50k or 100k Ohms at room temperature). If it reads “OL” (Open Loop) or 0 Ohms, the sensor is dead.
- Inspect the Relay: If the sensor tests fine, the fault is likely a “welded” relay on the main control board (Cause 3). Relays are mechanical switches; if they fuse shut, they provide constant power to the heater.
- Replace the part: Replace the thermistor ($10–$35) or the entire control board ($25–$90). Given the high voltage and fire risk involved with thermal runaway, if you are not experienced with electrical testing, take the unit to a professional.
Common Mistakes
- Continuing to use a unit that “runs hot.” If your air fryer is burning food at its lowest setting, the thermistor is failing. Do not leave it plugged in, as it could eventually lead to a fire.
- Replacing the thermal fuse instead of the sensor. A thermal fuse cuts power when it fails; a faulty thermistor keeps power on. Ensure you are replacing the correct component.


