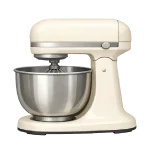
If you are dealing with a Stand Mixer Not Working, the problem is frequently a safety fail-safe or a simple wear component. These machines are designed with “sacrificial” parts that break to save the expensive motor. This guide ranks causes from common to less common to help you fix the issue in 2026.
4 Common Causes for Stand Mixer Not Working
1Motor Overheating (Thermal Overload)
Stand mixers (e.g., KitchenAid) are high-torque but have limits; heavy/dense loads (e.g., stiff bread dough beyond rated capacity) cause high current draw and heat, tripping the thermal overload protector. Most models feature this protector to cut power if the internal temperature exceeds safe limits.
Symptoms
- The mixer shuts off abruptly mid-use.
- The mixer head (especially rear/top) feels unusually hot; motor may emit a faint warm/electrical smell before/after trip.
Care Plan
- Immediately turn the speed lever to “Off” and unplug the unit.
- Remove the bowl and attachment to let the motor cool without any physical load.
- Wait at least 30 to 60 minutes for the internal thermal sensor to reset. KitchenAid models typically reset automatically after full cooling (~30 minutes for mild overloads, up to 60+ for severe); some older or specific models have a manual reset button on the bottom—check your model’s manual or underside for a red button to press after cooling.
- While waiting, use a soft brush to clear any flour or dust from the ventilation slots.
- Plug the mixer back in and test it on the lowest speed before resuming work.
Common Mistakes
- Forcing restarts while hot/overloaded, which stresses windings and may cause permanent failure if repeated; always allow full cool-down.
- Overloading the mixer beyond its rated flour capacity, causing it to overheat again immediately.
2Worn or Failed Carbon Brushes
Carbon brushes deliver electricity to the spinning motor armature. Because they are held against a moving part with springs, they naturally wear down over time. Worn brushes cause intermittent power, sparking, or a total failure to start.
Symptoms
- Intermittent operation, stuttering under load, or failure to start; moving the head or bowl may temporarily restore contact if brushes are marginal.
- You see visible sparking inside the side vents or hear an erratic buzzing sound.
Care Plan
- Unplug the mixer and locate the two large, slotted plastic caps on the sides of the motor housing.
- Carefully unscrew the caps with a flathead screwdriver (watch for the spring behind the cap).
- Remove the brushes and inspect the length; if they are shorter than 1/4 inch, they are spent. KitchenAid specifies replacement when brushes wear to less than ~1/4 inch (6mm) or show uneven wear/arcing; always replace both brushes as a pair, even if one appears longer.
- Align the ‘dog-ear’ or keyed notch on the brush with the holder slot to prevent rotation and ensure proper seating/contact.
- Re-screw the caps snugly and test the mixer at various speeds.
Common Mistakes
- Inserting the brushes backward, which prevents them from making contact with the armature.
- Replacing only one brush; always replace them in pairs to ensure even motor performance.
3Stripped Worm Gear (Safety Fail-Safe)
In KitchenAid and similar mixers, the worm gear (plastic/nylon) is intentionally sacrificial/weaker than metal gears to strip first during overload/jam, protecting the motor and pricier components. If the beater hits a solid object, the worm gear will strip its teeth to prevent the motor from stalling and burning out.
Symptoms
- The motor is humming or running loudly, but the attachment is not spinning.
- There is a loud “chattering” or grinding noise from the front of the mixer head.
Care Plan
- Unplug the mixer and remove the rear cover and top housing screws to access the gearbox.
- Use a putty knife to scrape away the grease and reveal the worm gear (usually a large, off-white gear).
- Inspect the gear for missing or flattened teeth; even one stripped tooth will cause failure.
- Drive out the roll pin holding the gear, slide on the new OEM gear, and replace the pin.
- Crucial: You must replace the gearbox grease if it contains plastic shards from the stripped gear to avoid damaging other metal components. Use only food-grade grease (e.g., KitchenAid-approved or Benalene 930-2 equivalent); contaminated grease with gear debris can accelerate wear on metal gears, planetary, or armature.
Common Mistakes
- Replacing the worm gear without cleaning out the old, contaminated grease.
- Installing a non-OEM metal worm gear (common aftermarket); it eliminates the sacrificial protection, causing faster wear or failure of the armature worm or other gears—always use OEM plastic/nylon.
4Speed Control Plate or Governor Fault
The speed control plate and the governor regulate how much power the motor receives. Over time, the copper contact points can become pitted, or the adjustment screws can vibrate loose, causing the mixer to lose its low-speed settings or fail to turn on at all.
Symptoms
- Speeds skip, only high works, or no low speeds; common from pitted contacts or misadjusted plate.
- The mixer surges (speeds up and slows down) while under a light load.
Care Plan
- Unplug the mixer and remove the rear housing cover (usually one screw).
- Inspect the speed control plate for loose screws or bent springs.
- Use a fine emery cloth or electrical contact cleaner to gently clean the copper contact points.
- Adjust the phase/link screws carefully: one for minimum (‘Stir’) speed (~1 revolution per second at the beater), the other for phase/centrifugal governor balance—consult model-specific video/guide for exact turns to avoid overspeeding.
- If the contacts are severely pitted or the springs are snapped, replace the entire speed control plate.
Common Mistakes
- Over-adjusting screws (especially without load testing), leading to runaway high speeds, vibration, or motor strain—adjust in small increments and test unloaded first.
- Attempting to adjust the plate while the mixer is plugged in, which presents a high shock risk.


