A washer not spinning is one of the most disruptive laundry problems you can face, and in 2026 it remains one of the most common appliance repair calls. Some causes take five minutes to fix without tools; others require component replacement. This guide ranks the five most likely culprits from easiest to most complex so you can diagnose and resolve the problem efficiently.
5 Common Causes for a Washer Not Spinning
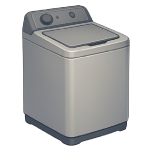
1Unbalanced or Overloaded Drum
Modern washers have a built-in out-of-balance sensor that halts the spin cycle when it detects uneven weight distribution. This is the single most common reason a washer stops spinning mid-cycle, and it requires no tools or parts to fix. A single heavy item — a wet comforter, a thick pair of jeans, or a bath mat — can shift to one side of the drum and trigger the cutout repeatedly.
Symptoms
- The drum fills and agitates normally but stops before or during the spin cycle
- The machine may pause and attempt to redistribute the load before stopping completely
- No error codes, or a generic “UE” / “UB” (unbalanced) error code on digital displays
Care Plan
- Open the lid or door and physically inspect the drum — look for all items bunched to one side or tangled around the agitator post.
- Remove roughly half the load if the machine is packed tightly. Overloading prevents free drum rotation and stresses the motor.
- Redistribute the remaining items evenly around the drum wall by hand.
- Close the lid or door and restart the spin-only cycle. If successful, load heavy items in balanced pairs going forward — for example, two jeans items or two towels — rather than a single heavy piece on its own.
- If the machine still stops mid-spin with a balanced, reasonably sized load, check the pump filter and drain hose for a clog before moving to Cause 2. A blocked drain is a very common trigger for spin cutouts and takes only minutes to check — locate the access panel at the bottom front of the machine, place a shallow pan beneath it, and unscrew the filter cap slowly to catch residual water.
Common Mistakes
- Restarting the cycle without redistributing the load — the machine will stop again in the same place.
- Assuming a balance error means a mechanical fault and skipping straight to disassembly, when the actual fix is a 30-second manual redistribution.
2Faulty Lid Switch or Door Latch
The lid switch on a top-loader — or the door latch assembly on a front-loader — tells the control board that the door is securely closed before allowing the drum to spin. When this switch fails electrically or the plastic striker tab that activates it breaks off, the washer receives no “door closed” signal and will refuse to enter the spin cycle entirely, even though everything else is working correctly. These components wear out through repeated mechanical contact and are among the most common electrical failures on machines over five years old.
Symptoms
- The machine fills and agitates but the spin cycle never starts, with no audible click when the lid closes
- On top-loaders, you can manually depress the lid switch plunger with a finger and hear no click, or the cycle begins only when the lid is held down firmly
- On front-loaders, the door feels loose, the latch does not engage with a click, or a “door open” error code appears
Care Plan
- Unplug the washer from the wall outlet before doing anything else. The lid switch circuit carries line voltage on most machines, and probing it while powered can cause a serious shock.
- On a top-loader, lift the lid and locate the small plastic or metal strike tab on the lid itself — check whether it is intact. A broken or missing striker is often the only fault and can be replaced for under $10.
- To test the switch itself, access it by removing the two screws at the front of the cabinet top (on most top-loaders, the top panel tilts back once the screws are removed). Disconnect the two- or three-wire harness connector from the switch.
- Set your multimeter to the continuity setting and probe the two terminals of the switch while manually pressing the plunger. A working switch will produce a beep or show near-zero resistance (typically below 10 ohms) when pressed. If your multimeter does not have an audible beep, the display will read near-zero ohms for continuity, or show “OL” / “1” for no continuity — no continuity with the plunger depressed confirms the switch has failed.
- Order a replacement switch by your washer’s model number (located on the door frame or back panel), install it in reverse order, reconnect the harness, and test. If the machine still does not spin after replacing a confirmed-dead switch, escalate to a professional — the issue may be in the wiring harness or control board. Labor rates vary significantly by region — rates in major metro areas may exceed the ranges shown in the cost table above.
Common Mistakes
- Testing the switch without unplugging the machine first — the switch circuit carries line voltage on many models and can deliver a fatal shock. The machine must be unplugged before any probing.
- Ordering the switch by model name rather than model number — many brands share names across different platforms, and the wrong switch will not fit or wire correctly.
3Worn or Broken Drive Belt
Belt-driven washers — primarily older top-loaders and a number of front-load models — use a rubber drive belt to transfer motor rotation to the drum pulley. Over time, heat, friction, and mechanical stress cause the belt to stretch, crack, glaze (develop a hardened, shiny surface caused by heat and slippage), or snap entirely. When the belt fails, the motor runs but the drum does not move — you will typically hear the motor humming or running normally while the drum sits completely still.
Symptoms
- The motor is audibly running during the spin cycle but the drum does not rotate at all
- A burning rubber smell, especially during or immediately after a spin attempt
- Check for cracks, glazing (a hardened, shiny surface caused by heat and friction), fraying, or a completely snapped belt when you access the interior
Care Plan
- Unplug the washer and turn off both water supply valves before removing any access panels.
- Locate the access panel for the drive belt. Access points vary significantly by brand and model — on some machines the rear panel is removed, on others it is a lower front panel. Do not assume which panel is correct. Look up your machine’s model number in the manufacturer’s service manual or a parts diagram before removing any panel — removing the wrong panel on a front-loader, for example, can damage door boot seal wiring. Wear work gloves, as panel edges can be sharp.
- Once you have access, locate the belt running between the motor pulley (at the bottom) and the drum pulley (at the top). Inspect its condition — a glazed, cracked, or snapped belt confirms the diagnosis.
- Release belt tension by slipping the belt off the motor pulley first, then off the drum pulley. Note the belt’s routing path before removing it entirely.
- Order a replacement belt using your washer’s model number — do not attempt to measure a worn, stretched, or broken belt to determine sizing, as a stretched belt will measure longer than spec and a broken belt cannot be measured at all. Route the new belt exactly as the original, hook it over the drum pulley, then rotate the drum pulley by hand to walk the belt onto the motor pulley — do not use screwdrivers or pry tools, as this can damage the belt lip. If the drum still does not spin with a correctly installed new belt, the motor or drum pulley bearings may be at fault — call a technician.
Common Mistakes
- Sizing a replacement belt by measuring the old one — a worn or broken belt will give an incorrect measurement. Always identify the replacement by model number.
- Using a pry tool to seat the belt on the pulley, which can nick or crack the belt immediately, causing it to fail again within a few cycles.
4Failed Motor Coupling
The motor coupling is a sacrificial connector between the motor shaft and the transmission on direct-drive top-load washers. It is engineered to break under overload rather than allowing the motor or transmission to suffer damage. When it fails — through overloading, age, or a seized pump or transmission — the motor runs freely but torque is never delivered to the drum. This repair is very common on Whirlpool, Maytag, and Kenmore top-loaders built on the Whirlpool direct-drive platform.
Symptoms
- The motor hums and runs but the drum does not move or agitate at all
- No belt squeal or burning smell — the failure is silent mechanical disconnection
- The machine may drain normally but never transitions to spin
Care Plan
- Unplug the washer and disconnect both water supply hoses. This machine is heavy — top-load washers typically weigh 150–200+ lbs. Have a second person assist before tilting or moving the unit. Pull the machine away from the wall to create working clearance, and protect the floor beneath it.
- Access the motor coupling. The steps below describe the Whirlpool direct-drive cabinet specifically — your model’s service diagram may differ. Look up your model number before proceeding. On a Whirlpool-platform machine, use a putty knife to release the spring clips located at the front corners of the cabinet top, tilt the top back, and lift off the front panel. This will expose the motor and pump assembly at the base of the machine.
- Locate the coupling between the motor shaft and the transmission input shaft. The three-piece plastic-and-rubber coupling design described here is specific to the Whirlpool direct-drive platform — verify your machine’s coupling design before ordering parts. Inspect all three pieces for cracks, missing rubber inserts, or complete separation.
- Before installing a new coupling, manually rotate the pump impeller (accessible from the same area) to confirm it spins freely. A sock, coin, or debris lodged in the pump is a very common cause of coupling failure — a jammed pump will destroy a replacement coupling within one or two cycles. Clear any obstruction before proceeding.
- Remove the motor mounting bolts to slide the motor back slightly and release the old coupling pieces. Install the new coupling by pressing the rubber center piece onto the motor shaft, then the plastic drive forks onto each side. Reassemble in reverse order and test. If the new coupling breaks again within a few cycles, the transmission or pump is likely seizing — this requires professional diagnosis, as transmission replacement on an older machine often exceeds the machine’s value.
Common Mistakes
- Skipping the pump impeller check before installing the new coupling — a jammed pump will shear the replacement coupling immediately, wasting the part and your time.
- Using the coupling replacement steps above on a non-Whirlpool-platform machine without first consulting the service manual — cabinet removal procedures differ, and forcing the wrong clips can crack the cabinet.
5Defective Control Board
The main electronic control board (PCB) is the “brain” of the washer. it manages the timing of the cycles and sends voltage to the motor to initiate the spin sequence. If a relay on the board burns out or a circuit trace shorts, the board may never signal the motor to spin, even if every other mechanical part is in perfect condition. Control board failures are less common than mechanical ones but are more likely after a power surge or in high-humidity environments.
Symptoms
- The washer fills and drains normally but sits completely silent during the spin portion of the cycle.
- The display shows garbled characters, random error codes, or the machine resets itself mid-cycle.
- You have already confirmed that the lid switch (Cause 2) and motor components (Causes 3 and 4) are functional.
Care Plan
- Perform a “Hard Reset”: Unplug the washer for 10 full minutes. This allows the capacitors on the board to discharge and can sometimes clear a “frozen” software state. Plug it back in and try a spin-only cycle.
- Access the Board: Unplug the washer. The control board is typically located behind the console (the part with the buttons/dials). You usually need to remove a few screws at the back or under plastic end caps to tilt the console forward.
- Visual Inspection: Look for “cold” solder joints (cracked or dull gray rings), swollen or leaking capacitors (cylinders with bulging tops), or charred, black scorch marks on the board. Any visible damage confirms the board is dead.
- Test Voltage: (Advanced DIY only). If no damage is visible, a multimeter can be used to check if the board is outputting the required 120V to the motor harness during the spin cycle. If the board has power coming in but none going out to the motor, it has failed.
- Replace the Board: Source an exact OEM replacement by matching your full model number ($100–$350). Transfer the wire connectors one by one to the new board to ensure they go to the correct terminals. Reassemble and test.
Common Mistakes
- Replacing the board for a lid switch problem. Always test the $20 lid switch before the $200 control board.
- Handling the board without grounding. Static electricity from your body can fry a new control board instantly. Always touch a grounded metal part of the washer frame before touching the PCB.


