A washer not spinning or draining can bring laundry to a complete halt, but most failures trace back to one of five fixable causes. This guide ranks them from most to least likely, so you can work through a logical diagnosis rather than guessing — starting with the simplest no-cost fix and escalating only if needed.
5 Common Causes for a Washer Not Spinning or Draining
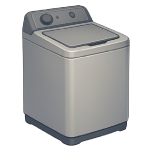
1Clogged Drain Filter or Drain Hose
The drain filter — sometimes called a pump filter or coin trap — catches lint, coins, hair, and small objects before they reach the pump. When it becomes fully blocked, water cannot exit the drum, and the machine’s safety logic halts the spin cycle to prevent an overflow. A kinked or pinched drain hose produces the exact same result: water has nowhere to go, so the machine stops. This is by far the most common cause and costs nothing to fix if the components are undamaged.
Symptoms
- Drum fills and agitates normally, but the machine stops before or during spin with water still sitting in the tub
- Standing water remains in the drum at the end of a cycle
- Error codes related to drainage (e.g., E2, F21, 5E, or OE depending on brand) appear on the display
Care Plan
- Unplug the washer and confirm the outlet is dry before doing anything else. Place several large towels and a shallow pan on the floor — some water will spill regardless of how carefully you work.
- Locate the drain filter. On front-loaders, it is typically behind a small access door at the lower front of the machine. On top-loaders with a filter, consult your model’s owner’s manual — some are located near the drum rim, others under the agitator cap.
- Drain residual water in a controlled manner by slowly unscrewing the filter cap (counterclockwise) just enough to let water trickle into the shallow pan. Work slowly to avoid a sudden flood. Once flow stops, fully remove the filter cap.
- Remove and clean the filter under running water, removing all lint, debris, and foreign objects. Inspect the filter housing cavity with a flashlight for any remaining blockage.
- Inspect the drain hose at the back of the machine. It should have no kinks, sharp bends, or visible crushing. Ensure the hose is not inserted more than 4.5 inches into the standpipe — over-insertion creates a siphon effect that can cause intermittent drainage failure. Reinsert the filter, run a short rinse-and-spin cycle, and confirm drainage. If the machine still won’t drain, proceed through Causes 2 and 3 before concluding the pump itself has failed.
Common Mistakes
- Removing the filter cap too quickly, releasing a full rush of water onto the floor and into nearby electrical outlets — always use the slow-drain method described in Step 3.
- Reinserting the filter without checking the housing cavity, leaving a coin or button fragment behind that immediately re-clogs the pump intake.
2Faulty Lid Switch or Door Latch Assembly
The lid switch (top-loaders) and door latch assembly (front-loaders) serve as a critical safety interlock: the machine will not spin — and in many designs will not drain — unless the control circuit confirms the lid or door is securely closed. When the switch or latch fails mechanically or electrically, the machine behaves as if the door is open regardless of its actual position, and the spin and drain functions are suppressed. These components fail through normal wear, a broken plastic tab, or a faulty internal contact.
Symptoms
- Machine fills and agitates but stops completely before spinning, with no error code or with a “door open” code even though the door is fully closed
- Clicking sound when closing the lid that is noticeably absent or changed compared to normal
- On top-loaders: the cycle pauses the moment the lid is opened and never resumes when closed again
Care Plan
- Unplug the washer. This repair involves components directly connected to the machine’s control wiring — always confirm power is disconnected before proceeding.
- Visually inspect the lid strike and latch body. On top-loaders, look for a broken or bent plastic tab on the lid that depresses the switch plunger. On front-loaders, inspect the door hook and latch receiver for cracks or deformation. A broken strike tab is the single most common failure mode and is immediately visible.
- Test the switch with a multimeter. Disconnect the lid switch wiring harness connector and place your multimeter probes on the terminals corresponding to the spin/drain control circuit for your specific model — consult your model’s wiring diagram (available in the service manual or on the manufacturer’s support site) to identify the correct terminal pair. Most lid switches are normally-open: a working switch shows continuity when the plunger is depressed and open circuit when released. Some Whirlpool and Maytag designs include a normally-closed circuit alongside the normally-open circuit — test all terminal combinations and compare results against the wiring diagram to avoid a false pass.
- Replace the switch or latch assembly if it fails the continuity test or if the strike tab is broken. These parts are model-specific — use your full model number (found on the label inside the door frame or lid) to order an exact replacement. Installation is typically the reverse of removal: disconnect the old harness, unscrew the switch from its bracket, fit the new switch, and reconnect the harness.
- Reinstall the lid or door panel, plug the machine in, and run a test spin cycle. If the machine still won’t spin or drain after replacing a confirmed-faulty switch, proceed to Cause 3.
Common Mistakes
- Attempting to bypass the lid switch with a jumper wire to test whether the switch is the problem. This defeats a critical safety mechanism — a top-loader drum spinning at 800–1,200 RPM with no lid interlock can cause severe lacerations, crush injuries, or entanglement, particularly to children in the area. Jumpering the lid switch is never an acceptable diagnostic step under any circumstances.
- Ordering a replacement switch by description alone rather than by full model number, resulting in a part with the wrong terminal configuration or mounting bracket that appears to fit but tests incorrectly.
3Worn or Broken Drive Belt (Belt-Driven Models Only)
Important: Not all washers use a drive belt. Direct-drive top-loaders — including the widely used Whirlpool direct-drive platform that dominated the US market for decades — use a motor coupling instead of a belt, and many modern front-loaders use a direct-drive or inverter motor with no belt at all. Before following this section, confirm that your specific model is belt-driven by consulting the service manual or searching your model number on a parts lookup site such as ApplianceParts Pros or Repair Clinic. If your model uses a motor coupling, see the note at the end of this section.
On belt-driven washers, a single drive belt transfers power from the motor to the drum pulley. Over time, heat and friction cause the belt to crack, fray, or glaze — even a belt that appears intact can slip if its surface has hardened. A snapped belt produces an immediate and total loss of drum movement; a glazed or partially worn belt may produce intermittent spin failure or a burning rubber smell under load.
Symptoms
- Motor runs audibly but the drum does not move at all, or moves only weakly under light load
- Burning rubber smell during or after a spin attempt
- Belt fragments, dust, or rubber residue visible inside the cabinet when the access panel is removed
Care Plan
- Unplug the washer. Remove the rear access panel (most top-loaders) or the front lower panel (most front-loaders) — consult your service manual for the correct access point on your model. Set the fasteners aside in a small container so they don’t get lost.
- Locate and visually inspect the drive belt. It runs between the motor pulley (small) and the drum pulley (large). Check for obvious signs of damage — cracking, fraying, a complete break, or glazing (a shiny, hardened surface on the belt caused by heat and slippage — even without visible cracking, a glazed belt will slip under load and must be replaced).
- Remove the old belt by sliding it off the motor pulley first, then off the drum pulley. Note the belt routing before removing it, or photograph it clearly.
- Install the new belt by looping it around the drum pulley first, then positioning it on the motor pulley. Rotate the drum by hand in the same direction as normal spin (typically counterclockwise when viewed from the rear on most top-loaders — confirm in your service manual) while guiding the belt onto the motor pulley. Rotating in the correct direction causes the belt to walk onto the pulley evenly; rotating in the wrong direction can cause it to ride off or kink before it seats.
- Confirm the belt sits evenly in both pulley grooves with no twisting, then reinstall the access panel. Plug the machine in and run a spin-only cycle to confirm normal drum movement. If the motor runs but the drum still doesn’t turn after fitting a confirmed-good belt, the motor itself or the motor coupling may be at fault — call a licensed appliance technician for further diagnosis.
A note on motor couplings: If your washer is a direct-drive top-loader (common Whirlpool, Maytag, Kenmore, and Roper models), the equivalent failure is a broken motor coupling — a three-piece plastic-and-rubber connector between the motor shaft and the pump/transmission. The symptoms are identical to a broken belt: motor runs, drum doesn’t move, possible burning smell. Motor couplings cost $10–$20 and are a straightforward DIY replacement, but the procedure differs from belt replacement. Search your full model number plus “motor coupling replacement” for model-specific instructions.
Common Mistakes
- Installing the new belt without cleaning out belt dust and debris from the cabinet interior — residual fragments can interfere with the new belt’s seating and accelerate wear.
- Rotating the drum in the wrong direction during installation, causing the belt to slip off the motor pulley repeatedly and leading to a misdiagnosis that the pulley is misaligned. Always verify the spin direction in your service manual before “walking” the belt onto the pulleys.
4Failed Drain Pump Motor
The drain pump motor is responsible for actively forcing water out of the drum and into the standpipe. Even if the drain filter (Cause 1) is clear, the pump motor itself can fail electrically (burnt windings) or mechanically (a broken impeller blade or seized bearing). If the pump cannot evacuate the water, the machine’s pressure sensor will never signal the control board that it is safe to begin the high-speed spin cycle.
Symptoms
- The machine hums loudly during the drain phase, but the water level does not drop.
- You hear a grinding or clattering sound from the bottom of the machine.
- The washer agitates normally but “gets stuck” and won’t transition to the spin cycle, often accompanied by a “No Drain” error code.
Care Plan
- Unplug the washer and manually drain the drum using the emergency drain hose or the filter cap method described in Cause 1.
- Access the pump: On most front-loaders, the pump is located at the bottom front; on top-loaders, it is typically accessed by tilting the machine back or removing the front panel.
- Test for Continuity: Disconnect the wire harness from the pump motor. Set your multimeter to the lowest Ohm (Ω) setting. Touch the probes to the pump’s terminals. A healthy pump motor typically reads between 5 and 15 ohms. If it reads “OL” or infinite resistance, the motor is dead and must be replaced.
- Check for Impeller Damage: If the motor has continuity, remove the pump housing and inspect the plastic impeller blades. If they are snapped or loose on the shaft, the pump cannot move water.
- Replace the Pump: Install an exact OEM replacement pump ($35–$150). Ensure the hose clamps are tight to prevent leaks. Reassemble and test.
Common Mistakes
- Replacing the pump when a sock is stuck in the hose. Before buying a new pump, always check the “sump hose” (the large black bellows hose between the tub and the pump) for trapped laundry items or coins.
- Assuming a hum means the pump is working. A humming pump is often a stalled pump. If it’s humming but not moving water, it is either jammed or has a failed start winding.
5Faulty Control Board or Motor Control Unit
The main control board (or Motor Control Unit in some front-loaders) is the brain that coordinates the drain pump and the spin motor. If the board has a failed relay, a blown capacitor, or a corrupted firmware state, it may fail to send voltage to the pump or motor even if those components are brand new. This is the least likely but most expensive cause.
Symptoms
- The machine is completely unresponsive during the spin/drain phase despite having power.
- You see visible burn marks or “puffed up” capacitors on the circuit board.
- The machine behaves erratically—skipping cycles, resetting itself, or displaying nonsensical error codes.
Care Plan
- Perform a “Hard Reset”: Unplug the washer for 10 full minutes. This allows the capacitors on the board to fully discharge and can clear transient software glitches.
- Visual Inspection: (Unplugged only!) Open the console or rear access panel to locate the board. Look for scorched traces or a “burnt electronics” smell.
- Check Output Voltage: Using a multimeter, a technician would check if the board is actually outputting 120V to the drain pump when the cycle calls for it. If there is power going into the board but nothing coming out to the components, the board is dead.
- Replace the Board: Control boards are expensive ($100–$400). If the machine is over 10 years old, this often triggers a “Replace” decision rather than a “Repair” (see Repair vs. Replace table).
Common Mistakes
- Overloading the Machine: Consistently washing heavy rugs or comforters puts extreme torque on the drive belt (Cause 3) and can cause the control board to overheat and fail.
- Using Too Much Detergent: Excessive suds (suds lock) create air pockets in the drain pump, preventing it from catching the water and essentially “tricking” the machine into thinking it’s still full. Use only 1–2 tablespoons of HE detergent in 2026 models.
- Ignoring the “Emergency Release”: Many homeowners break their door handles trying to force a stuck door. If your washer won’t drain, use the manual release cord (usually located near the drain filter) to get your clothes out before troubleshooting.


