A washer not turning on is one of the more disorienting appliance failures because it leaves no running sounds or error codes to diagnose — just silence. In 2026, most cases trace back to four fixable causes. This guide ranks them from most to least likely so you can resolve the issue efficiently without replacing parts you don’t need.
Note: This guide is current for 2025–2026 model years and reflects US market pricing. Costs vary by region and model.
4 Common Causes for a Washer Not Turning On
1Power Supply Failure
The most common reason a washer will not turn on is a disrupted power supply — and it is almost always the easiest to fix. A tripped circuit breaker, a faulty wall outlet, a blown fuse on the machine’s internal power board, or a damaged power cord can all cut power completely, leaving the washer with no lights, no sounds, and no display activity. Before opening the machine, rule out every external power source first.
Symptoms
- Washer is completely dead — no lights, display, sounds, or response to any button
- Washer started a cycle recently but stopped and will not restart
- Other appliances on the same circuit are also without power
Care Plan
- Unplug the washer from the wall outlet.
- Test the wall outlet by plugging in a lamp or phone charger — if the outlet is dead, the issue is upstream of the washer.
- Before resetting the breaker, confirm the washer is still unplugged. Go to your home’s electrical panel and look for any tripped breakers. A tripped breaker sits between ON and OFF — flip it fully OFF, then back ON.
- Plug the washer back in and attempt to power it on. If the breaker trips again immediately, stop and call a licensed electrician — do not reset it a second time.
- If the outlet and breaker are both functional, inspect the power cord along its full length for fraying, scorch marks, or crushed sections. For standard 120V washers with a plug-in cord, replace the cord if damaged using the exact voltage and amperage rating listed on your washer’s spec plate. If your washer uses a 240V supply — identifiable by a larger three- or four-prong plug or a hardwired connection at the back panel — do not attempt cord or terminal replacement yourself. Have a licensed electrician or appliance technician perform this repair. If all external power sources check out and the washer remains dead, escalate to a professional to test the internal thermal fuse and terminal block.
Common Mistakes
- Resetting the breaker while the washer is still plugged in — always unplug first, then reset, then reconnect.
- Replacing the power cord with a generic or incorrect-amperage substitute — always match the voltage and amperage rating printed on the spec plate exactly.
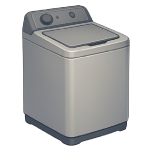
2Lid Switch Failure (Top-Load)
On top-load washers, a safety mechanism prevents the drum from spinning unless the lid is confirmed closed. The lid switch — a small electromechanical component typically located along the front or side edges of the lid opening (the exact position varies by model) — sends this confirmation signal to the control board. When the switch fails, the board receives no “lid closed” signal and refuses to start any cycle, even though the washer has full power. The switch itself is inexpensive and accessible, making this one of the most cost-effective DIY repairs on a washer.
Symptoms
- Washer has power and the display is active, but pressing Start does nothing
- No drum movement, agitation, or water fill begins
- Lid closes normally but the machine does not respond
Care Plan
- Unplug the washer from the wall outlet.
- Open the lid and look along the front and side edges of the lid opening for a small plastic switch housing. The actuator — a plastic tab or peg — will be mounted on the underside of the lid itself and presses down into the switch body when the lid closes. The exact location varies by model; consult your model’s service diagram if you cannot locate it visually.
- Set a multimeter to continuity mode. Disconnect the switch’s wiring harness (note which wire connects to which terminal with a photo before disconnecting). Place one probe on each terminal. With the actuator tab in the open (unactuated) position, you should read no continuity. Now manually press the actuator tab down to simulate the lid-closed position — you should hear the multimeter beep and read continuity. If pressing the actuator produces no change in continuity, the switch has failed and needs replacement.
- Order a replacement lid switch using your washer’s exact model number (found on the label inside the door opening or on the back panel). Install the new switch, reconnect the wiring harness in the correct orientation using your photo as reference, and reassemble any panels.
- Plug the washer back in and run a short test cycle. If the washer still will not start after a confirmed switch replacement, escalate to a professional — the control board may not be receiving the signal correctly, indicating a wiring or board issue.
Common Mistakes
- Testing the switch only in the open (unactuated) position and concluding it has failed — always depress the actuator tab during the test to simulate the lid-closed state before drawing a conclusion.
- Installing a replacement switch with the wiring harness reversed — photograph the original connections before disconnecting anything.
3Main Control Board Failure
The main control board — also called the PCB (printed circuit board) or electronic control module — is the processing hub of your washer. It interprets button inputs, manages cycle logic, and sends commands to every other component. When it fails, the washer may be completely unresponsive or behave erratically. Control board failure is less common than switch or power supply issues and should only be diagnosed after those causes have been ruled out, as it is the most expensive single repair in this guide.
Symptoms
- Washer is completely unresponsive with no lights, sounds, or display despite confirmed power at the outlet
- Display shows a frozen or repeating error code, or intermittent screen flickering before going blank — note that a failed display ribbon cable can mimic these symptoms, so confirm the board is the source before ordering parts
- Buttons produce no response or random, inconsistent behavior
Care Plan
- Unplug the washer from the wall outlet and wait at least 5 minutes before opening any panel to allow capacitors on the control board to discharge.
- Locate the control board — it is typically housed behind the main control panel at the top rear of the machine. Remove the screws securing the panel (usually Phillips-head) and carefully tilt or lift it to expose the board.
- Confirm the washer is still unplugged before touching any connectors. Check all wiring harness connectors plugged into the board — unplug each one and reseat it firmly. Corrosion, vibration, or shipping damage can cause connectors to work loose over time, and a reseated connection occasionally restores function without any part replacement.
- Visually inspect the board surface for burn marks, swollen or bulging capacitors, or scorch damage. Any visible damage confirms the board needs replacement.
- If replacing the board, order the part using your washer’s exact model number. Many manufacturers sell refurbished boards at lower cost than new OEM boards — confirm any refurbished board is pre-programmed for your specific model before purchasing. Important: Some Samsung, LG, and certain Whirlpool models require software initialization or firmware flashing after board replacement, performed either via a specific button sequence in the service manual or by a technician. If your new board installs correctly but the washer still does not respond, contact the manufacturer’s service line before assuming the board is defective. If you are not comfortable with this level of disassembly, call a qualified appliance technician.
Common Mistakes
- Ordering a control board before ruling out power supply and switch failures — the board is the most expensive component and should be a last resort after all simpler causes have been eliminated.
- Plugging connectors into incorrect ports when reassembling — exact harness connections are critical. Plugging a connector into the wrong port can send incorrect voltage to components and cause immediate failure or a fire hazard. Photograph all connections before removing anything.
4Door Latch Assembly Failure (Front-Load)
On front-load washers, the door latch assembly serves a dual function: it physically secures the door closed during operation and contains an integrated micro-switch that signals the control board to allow the cycle to begin. This is an important distinction from Cause 2: on most front-load washers, the latch hardware and the door switch are a single combined assembly — they are the same physical part. The separation between Cause 2 (lid switch) and Cause 4 (door latch) in this guide reflects the top-load vs. front-load difference in design, not two separate components on the same machine. If you have a front-load washer and you are reading both Cause 2 and Cause 4, remember that you are dealing with a single integrated unit. If the latch fails to engage or the internal switch fails to “close,” the machine will stay in standby mode and never start the motor or fill with water.
Symptoms
- The door closes but the “Door Lock” light flashes or never illuminates.
- You hear a repetitive clicking sound as the machine tries (and fails) to engage the lock.
- The washer has power and the display is lit, but nothing happens when you press “Start.”
Care Plan
- Unplug the washer. For front-load machines, you will be working very close to the metal frame; confirm power is off.
- Access the Latch: Open the door. Most front-load washers require you to remove the spring-loaded wire hoop that holds the rubber door boot (bellows) in place. Use a flat-head screwdriver to gently pry the spring and pull the hoop off. Peel back the rubber boot near the latch to expose the assembly.
- Remove and Inspect: Unscrew the two Phillips-head screws holding the latch to the frame. Reach behind the frame to pull the latch assembly out. Check for visible damage, such as a melted connector or a broken plastic pin.
- Test with a Multimeter: (Professional/Advanced DIY only). Front-load latches often have 3 to 5 wires. You must identify the “common” and “switch” terminals using your model’s wiring diagram. With the latch manually engaged, the switch terminals should show continuity. If it fails, replace the entire assembly ($20–$80).
- Reassemble: Plug the new latch into the harness, screw it back into the frame, and carefully reseat the rubber boot and wire hoop. Plug the unit back in and test. If the door now locks but the cycle still won’t start, the fault may be in the Motor Control Unit (MCU) or the main board.
Common Mistakes
- Forcing the door handle. If the door won’t open, do not pull with extreme force. You will break the plastic handle, adding a second repair to your list. Use the manual release cord (usually located near the bottom drain filter) instead.
- Tearing the rubber boot. Be very gentle when prying the wire hoop and peeling back the rubber. A small tear in the bellows will cause a significant leak during the next wash cycle.


