Nothing is more inconvenient than a garage door transmitter not working when you’re arriving home. While it may seem like a motor failure, the issue is almost always a break in the wireless handshake between the handheld remote and the receiver. This guide ranks solutions from most likely to least likely to help you diagnose the issue efficiently.
5 Common Causes for Garage Transmitter Failure
1Battery Depletion or Corroded Terminals
Transmitters rely on 3V coin-cell batteries (usually CR2032 or CR2016). Over time, the internal contacts can oxidize or the battery can dip just below the 2.8V threshold required to transmit an encrypted signal. In 2026, many remotes use higher encryption levels that demand “peak” battery performance.
Symptoms
- The LED on the remote is dim or flickers when the button is pressed.
- The remote works intermittently or requires multiple presses.
Care Plan
- Pry open the transmitter casing using a small flathead screwdriver.
- Remove the battery and wipe the metal contacts with a dry cloth.
- Test the battery with a multimeter; if it reads below 3.0V, replace it.
- Ensure the battery is seated firmly in the clips.
- If the remote still fails, check for liquid damage on the green circuit board.
Common Mistakes
- Buying “discount” batteries; these often have lower initial voltages that trip 2026 security sensors.
- Forgetting to remove the plastic “pull tab” from a new battery.
2Radio Frequency (RF) Interference (LED Bulbs)
In 2026, the most common “invisible” cause of transmitter failure is Radio Frequency (RF) interference. Cheap LED bulbs emit a signal that mimics the frequency of your garage remote, essentially “jamming” the airwaves whenever the lights are on.
Symptoms
- The remote works fine during the day but fails at night when lights are on.
- The remote works when you are outside the car but fails when you are inside.
Care Plan
- Turn off all LED lights in the garage and nearby outdoor fixtures.
- Test the transmitter; if it works, you have an interference problem.
- Replace your bulbs with “FCC Part 15” compliant LEDs designed for garage use.
- Check for other interference sources like wireless baby monitors or 2.4GHz routers located near the motor.
Common Mistakes
- Assuming the “Remote” is the problem when the “Bulb” is the culprit.
- Installing high-wattage non-shielded LEDs in the opener itself.
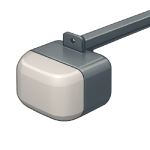
3Damaged or Shielded Receiver Antenna
The receiver antenna is a small, thin wire hanging from the motor head. If this wire is cut, kinked, or tucked inside the metal motor housing, it won’t be able to “catch” the signal from your transmitter, especially through a heavy or insulated garage door.
Symptoms
- The door opens from the wall button but not the remote.
- You have to touch the remote to the door for it to work.
Care Plan
- Climb a ladder and locate the small wire antenna on the back or side of the motor.
- Ensure it is hanging down freely and not wrapped around the chassis.
- Straighten any kinks in the wire.
- If the wire is missing, you can sometimes “extend” it with a 10-inch piece of insulated copper wire.
- Ensure there are no large metal objects (like refrigerators) placed directly between the door and the motor.
Common Mistakes
- Tucking the antenna away to make it “look cleaner,” which kills the signal range.
- Painting over the antenna wire, which can add metallic shielding.
4Transmitter Memory De-Sync
A power surge or a “low-voltage” event (like a brownout) can cause the motor’s logic board to drop the transmitter’s unique code from its memory. In 2026, smart openers may also de-sync if a software update was interrupted.
Symptoms
- The remote LED blinks strongly, but the motor shows no response.
- One remote works while the other does not.
Care Plan
- Locate the “Learn” button on the motor head (Yellow, Purple, or Red).
- Press and release the Learn button; the indicator light will glow steadily.
- Within 30 seconds, press the button on your transmitter.
- The motor light will flash once to confirm it has “re-learned” the remote.
- If it fails, try the process again while standing at least 5 feet away from the motor.
Common Mistakes
- Holding the Learn button too long, which erases every remote programmed to the unit.
- Standing too close to the motor during sync, which can “overwhelm” the receiver.
5Circuit Board Micro-Fractures
Transmitters lead a hard life—they are dropped, sat on, and subjected to car heat. Over time, the tiny solder joints on the circuit board (especially near the “Open” button) can develop micro-fractures, breaking the electrical path.
Symptoms
- The remote only works if you squeeze the casing hard while pressing the button.
- You hear something rattling inside the remote.
Care Plan
- Open the remote and inspect the solder points for the main button.
- If a point looks “dull” or has a crack, it is a cold solder joint.
- A steady hand and a fine-tip soldering iron can often re-seat the button.
- Clean the contact pad under the rubber button with isopropyl alcohol to remove skin oils.
- If the board is visibly scorched or bent, it is time to purchase a 2026 replacement transmitter.
Common Mistakes
- Using too much solder, which can “bridge” connections and cause the remote to stay “on.”
- Cleaning the board with water or harsh household cleaners.


